Wave Picking and Packing
The following instructions are based on a pick to order wave.
-
Log in to .wms on your RF scanner.
-
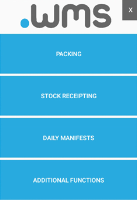
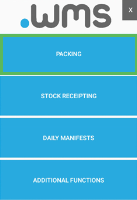
Tap PACKING on the main menu screen.
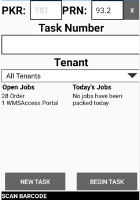
The Picking screen displays.
-
Scan the barcode of the wave ticket.
or
Tap NEW TASK. Then select the Waves - Picking option from the list. Select the appropriate wave ticket, then tap CONTINUE.
The Scan Barcode screen displays.
-
Scan the barcode of all the items that are included in the wave ticket.
If you are doing a wave task that includes multiple tenants that are using the same item code, you will be prompted to select the tenant for the item.
-
Enter the quantity of each item.
-
Tap CONFIRM PICK.
-
You may be prompted to scan the barcode of the ULD.
This depends on how .wms has been set up at your warehouse.
-
Tap SELECT once the ULD barcode has been scanned.
Next you may be prompted to enter the slot number of where each item is located.
-
Enter the slot number or scan it.
-
Complete the slot information for all slots.
A confirmation screen displays.
-
Tap CLOSE.
-
If all items on the wave ticket have been scanned and picked, the screen changes colour to green.
There may be additional shipping order instructions for the wave ticket which will display on the screen. For example, to pack the order in bubble wrap.
Depending on the configuration for the pack method, more message screens may display.
-
Tap CLOSE for all messages.
-
You may then be prompted to select the Carrrier.
-
Tap YES to confirm the carrier of choice or tap NO to select another carrier.
-
Go on to wave packing the items.
-
Make sure that you check the status of the wave ticket before you start packing.
In the .wms webUI, click Shipping on the top navigation bar then select Wave Status from the drop-down menu. Find and select the wave ticket.
After the picking phase is complete, the wave ticket has a status of Packing.
On the RF scanner, the Pack screen displays once the picking phase is complete. The job order number displays in the top left-hand corner of the RF scanner screen so you are aware of which job you are packing.
-
Scan the barcode of the item to be packed.
Errors display if you scan an incorrect item. Tap CLOSE then make sure you scan the correct item.
-
On a successful scan, tap COMPLETE.
You may be prompted to enter the dimensions of the packing carton.
-
Complete the dimension fields, then tap PROCESS.
You may be prompted to enter the charge code information for the items being packed.
-
Select and/or enter the required information, then tap PROCESS.
-
Tap CLOSE on the confirmation message.
Any special instructions associated with the wave ticket display.
-
Follow any of the special instructions for the wave ticket.
-
Once you have finished, tap CLOSE on the message.
You may then be prompted to select the Carrier.
-
Tap YES to confirm the carrier of choice or tap NO to select another carrier.
The picking and packing of the wave ticket is complete.
-
Close each screen on the RF scanner to return to the main menu.
-
Check the status of the wave ticket and the status of the orders in the wave ticket.
-
In the .wms webUI, click Shipping on the top navigation bar then select Wave Status from the drop-down menu. Find and select the wave ticket.
-
Find and select the wave number.
-
In the Action column, click Detail to open the wave.
-
View the information and status of the wave.
-
Click Close on the Wave Detail dialog box.
-


